After the previous three lessons we can go in a couple of directions. We could proceed to expand the capabilities of the Julia Preview window by learning to use the Rational fractal, which leads to an even greater variety of images. However, we are going to save that for lesson five. Right now, we are going to look at ways to achieve variety in coloring our fractal images.
You are probably getting tired of the same old gradients in your orbit trap images; now we are going to open up the range of possibilities dramatically by learning to use the Randomizer window. The Color Map Editor window actually gives you complete control over the coloration used in your fractal images, but it isn’t usually the best tool for exploring new possible color schemes. The Randomizer allows you to try different color maps that cover the whole gamut of possibilities; when you find a color map that you feel is effective, you can tweak it with the Color Map editor to achieve just the right effect.
The Randomizer basically picks colors at random and applies them to your fractal image. The Randomizer window allows you to set some important parameters that can make a big difference in the random maps that are generated. However, before we actually look at the Randomizer window itself, let’s experiment a little with the Randomize function using the initial default Randomizer settings. When you pick “Randomize” from the Palette menu, or , more simply, press “Command-R,” the color map of the fractal in the front window is replaced with a random one. Let’s see how that typically looks.
To create the following images, I brought up the standard Mandelbrot window, zoomed in on an area on the border to make things a little more interesting, then pressed Command-R a few times. I got the following series of images (I left out some, these are just the “highlights.”) The first image uses the original default mapping.
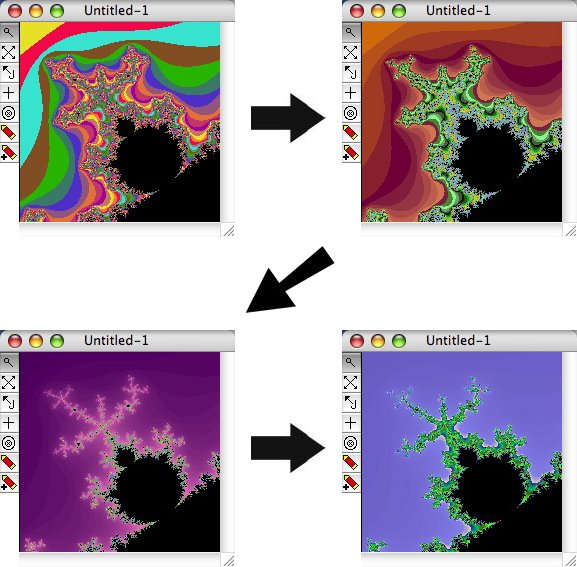
Note: the color maps generated in this way from the standard Mandelbrot set can be more interesting when you zoom more deeply into the image. Now, let’s try this with one of our standard orbit trap fractals. We get a new fractal window, click the Orbit Trap box in the Orbit parameters dialog, set the background to black and zoom into an interesting area on the border. The result is the first image below. Then we press Command-R a few times, getting the following results:
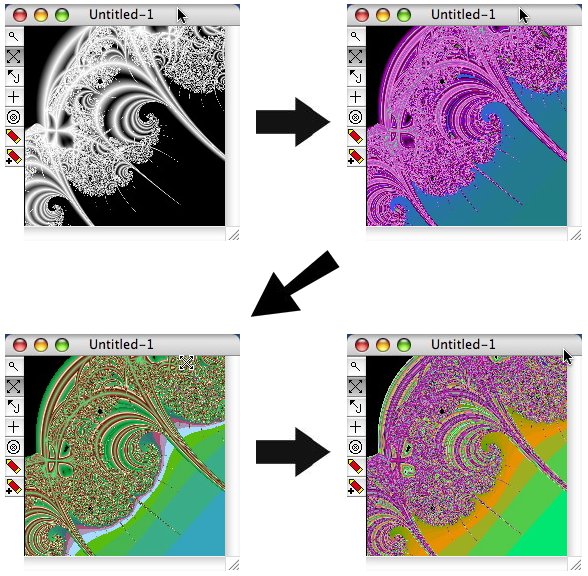
We render the last image as 600×600 anti-aliased to get a closer look.

Although an image like this has its own charm, there are some aspects that you may want more control over. For one thing, we originally set the background (the “exterior” region) to black, but it didn’t stay black. It changed to a different color map every time we pressed Command-R. This is because the default behavior of the Randomizer is to separately randomize each region in the image, and an orbit trap fractal has at least two regions (the “Exterior” region and the “Trap” region).
Another problem is that the trap region (the region consisting of the stalks) has too many colors mapped into it. The psuedo-3D effect achieved by using gradients is lost when so many colors are used; furthermore, even if you like the new effect, you may want more control over how many colors are used.
In the next section we will discuss the Randomizer window and how it allows us to surmount many of these difficulties.